LIBRARY
Blog Copy
Sorry, no results were found, search again?
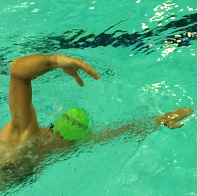
For a triathlete without a swim background, there are times when noon hour masters at the local pool can be frustrating. Triathletes are used to having results from strong work ethic and training, and swimming is the one discipline where the force applied does not directly transfer into speed. The foundations to your swim training are working on body position, and stroke efficiency: these are the essential components to getting faster in the water. One of the reasons why we spend a lot of time in the pool during winter months is to optimise our swim stroke and get in a lot of volume. However this will not necessarily translate into faster tri times as open water swimming involves a lot of specific skills: skills that may not be worked on in regular master practices of swimming up and down the lanes in single file. Here are five drills that will have you swimming like an expert in next season’s triathlons.
1. Sighting
Sighting is the most important orientation drill that should be worked on in the pool. The ultimate goal in sighting is to be able to incorporate it into your stroke pattern, and should be achieved without breaking your freestyle stroke. To accomplish this sighting needs to be incorporated into your regular breathing pattern in a way that allows your body to stay streamlines. To do so, you’ll need to start sighting right after your hand enters the water at the start of your stroke. You’ll take advantage of the brief moment where your hand goes toward to bottom at the catch phase to lift your head and peek a look in front of you. From there, you’ll start the pull phase in sync with lowering your forehead and starting your regular breathing pattern to the side. Take a peek every 6-10 strokes, feeling your body position maintain it’s strong shape. This drill should be practiced on both sides as you might experience wind and waves coming from one side or the other depending on races. It is even better to add it in longer endurance or fartlek sets where you’ll try to sight at the lowest energy cost possible.
2. Closed-eye swimming
Swimming straight in a pool is quite easy: you go back and forth along the big black line at the bottom of the pool. What you don’t realize is that you are subtlety adjusting your stroke to make them equally powerful. As soon as you close your eyes (or you swim open water with no reference point at the bottom) you’ll see that you don’t swim as straight as you might think. Try to do 10 strokes with your eyes closed (optimally in a quiet lane) and see how much you’ve drifted. Repeat the drill a few times until you swim in a straight line. In conjunction with sighting, straight line swimming will definitely shave a lot of time in your next tri swims. You’ll be able to sight and put the hammer down swimming straight.
3. Feet Drafting and Hip Drafting
Drafting in swimming, is a tactical skill that if done properly, can shave up to four seconds per hundred off your time! Do the math: that’s a minute shaved on an Olympic distance and two and a half minutes on an Ironman for the same energy expenditure. There are two types of drafting in swimming: feet drafting and hip drafting. The easiest one is the feet drafting. To do it properly, you need to be close enough to have your fingertips in the bubbles made by your lead swimmer but without poking him at each stroke. Once you are at the right spot, try to adapt your stroke rate to stay at the same distance off the lead feet.
Hip drafting allows you to take advantage of the wave made by the lead swimmer. It doesn’t necessarily make you a lot faster but it will slow down the lead swimmer by creating an effect of drag. Drafting sets are tough, fast and a lot of fun. You can do them by pairing up, or in larger groups if you have a homogenous group of athletes. You can use drafting sets to develop most of the energy systems. For example, instead of doing a long endurance set of 3 x 800m at an easy pace, include drafting in it and change the leader every 200m. To be more specific, you could also add sighting for the leader on the first 100m that he leads.
4. Buoy turning
If you have access to a pool where you can swim with the lane ropes removed, and a buoy placed mid pool, you can simulate buoy rounding. The first thing to think about in buoy turning is to increase your kicking to create momentum and space. In races, with the decreased speed, there is a larger number of athletes packed at buoys. Kicking harder will help you avoid getting swum over and jammed up under the buoy. Technically, the best way to negotiate buoys is to enter your hand closest to the buoy as wide as possible pulling in an angle from the outside to the inside. You’ll then do the opposite with the other arm, crossing at the entry and pulling toward the outside at the end of the stroke. Within two complete cycles, you’ll have negotiated the turn as efficiently as possible. Practice this slowly to understand the mechanics, then at faster, race pace rates.
5. Physiological training.
Open water swimming has its own specific physiological demands and there are two areas you can work on to be prepared for this. The first area is to prepare for the blend of energy systems involved in triathlon swimming. Whereas a great 1500m swimmer even splits her whole race, a triathlete usually redlines the first 300m meters before settling into race pace. You need to develop this capacity of recovering from a hard effort at a sustained pace by doing intervals with changing pace and effort.
Sample set: 3-6 x 400m with 45 seconds rest as the first 100m fast (3-6 seconds faster than race pace) followed by 200m at race pace and 100m easy. From there you can vary the length of the fast part, the race pace part and the recovery part depending on fitness.
The second area of open water specificity is the stamina required due to the absence of walls and flip turns. Try to swim in long course (50m) pools as part of your swim training to decrease the flip turns by 50% and get closer to the rhythm that you’ll feel in open water.
Practicing to be a triathlete is a lot about being specific while maintaining a physical training schedule. For swimming open water, practice makes perfect, and you can continue working on these open water skills throughout the winter. You’ll be amazed at how quickly you’ll improve and you’ll see concrete results on race day.
LifeSport coach Philippe Bertrand is a national head coach who has coached the national junior team to three World Championships, along with being an accredited coach at the Pan Am Games. Philippe enjoys coaching athletes from beginners to Olympian level. Contact Philippe to share your goals, race faster, or master the Ironman distance.
December 6, 2021
The treadmill is your secret weapon
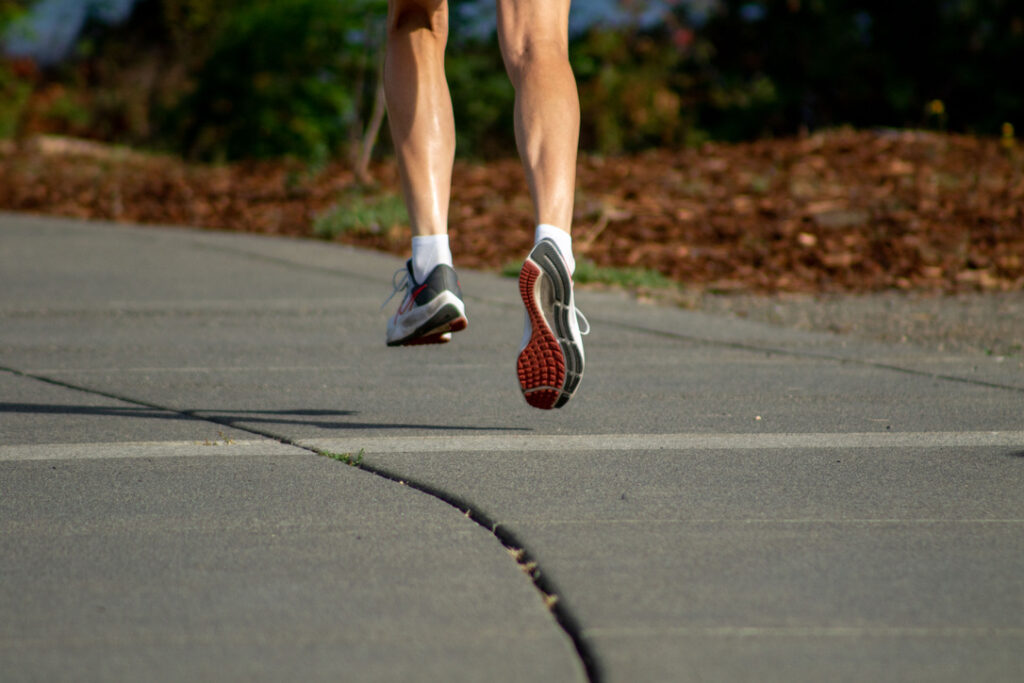
Triathletes know that the winter time is the best time of year to lay down some aerobic base miles. It is also a good time to retool your run form. While those in San Diego and Florida can still pull on run shorts and sleeveless tech tee, there are many in the northern states and north of the border who need creative solutions to get it done in the snow and ice. The treadmill is a useful tool for working on fitness, and a very effective instrument for working on skills. So, a word of warning to triathletes in the south: Northern treadmillers may not simply leveling the playing field for the 2022 season, they may be actually gaining an advantage. Consider implementing some of these technical ideas even if you live in a sunny climate.
Cadence.
Running well, and particularly running well off the bike, requires a mastery of cadence. When quads and glutes are fatigued, stride length suffers. You can learn to rely on foot speed (high cadence) and cardio output when you are too muscularly fatigued to toe-off and stride-it-out.
Interestingly, proper run cadence mirrors correct cycling cadence. Taller athletes (6 feet plus) men should aim for 80+ strides per minute (counting the foot strike of one foot only, i.e. your right foot), while smaller athletes (5’5” and under) might shoot for upper 90’s. Some smaller, elite Olympic distance triathlete women will run to a 34-35 minute 10 kilometre split at a super quick 110 strides per minutes. Most of us look for a cadence in the range of 88-93. As we run faster, cadence should increase, but the trick is to not have it slow down too much as we run slower. If you do over-stride (run with a long stride and slow cadence) you may be tricking yourself into thinking you are doing a better job than you actually are. With a lopping stride, you might feel great pressure on the ground with your toe off and good reach with each stride, but you are recruiting the fibres and the range of motion used for running fast, while neglecting rhythm and turnover and training your aerobic energy system in an economical manner. You will find you can run longer at a set pace and with a lower average heart rate once you have become comfortable with a quick, smooth gait. If you are an Ironman athlete, your aerobic running pace and aerobic efficiency will dictate your marathon potential.
The treadmill is a perfect tool for learning set cadence at different paces. It is common to time splits in a pool or on a running track to learn pacing. Learning to quantify your cadence versus pace and heart rate and cognitively associating these data numbers with effort or internal perception of movement will give you another level of understanding about how you perform and your efficiency. The treadmill gives you even pacing, allowing you to practice running a set cadence at different speeds. Try ninety strides per minute at your slow jogging pace, your high end aerobic pace, and then at tempo running or race pace. Take note what your heart rate does. It may be elevated initially, but as you get comfortable at higher turnover, you will note that it levels off. Over time, you can determine your most efficient cadence at different speeds for prolonged durations.
Technique.
The treadmill is a great coaching tool, as it allows the coach to watch the athlete move in a very controlled environment on stable surface. It is worth getting videoed on the treadmill at some point. Watching in slow motion lets you isolate biomechanics and also compare what one legs is doing relative to the other. Another solution is to run with mirrors, preferable in front and on both sides. Acquire a tall mirror that you can move easily throughout your session.
When reviewing your form, look at the feet, knees, hips, torso and shoulders. Look at yourself head-on or from behind (on video) to see if your foot strike is even, and from heel to toe off. Look for inward or outward rotation of the foot and if note if your ankles collapse. Check that knees are driving straight and that hips are even. If one hip or shoulder is higher than the other, it may be causing lower limbs to move slightly out of equilibrium. Look for excessive side to side or rotational movement of the hips or shoulders. Make sure shoulders aren’t too high or too tight. Check heel lift and knee lift. Are the balanced? One heel lifting higher than the other could indicate several things, including quad flexibility imbalance.
Efficient running is the act of controlled falling, actively catching yourself and propelling yourself forward into your next step. Examine your form and posture from the side on. You should be running “tall” through the hips and shoulder, but with a slight forward lean overall. Keep your chin slightly down and your eyes fixed on the ground about 10 feet in front of you to encourage keeping your center of gravity slightly forward. Check your foot strike from the side view. It should be directly under your centre of gravity. A heavy foot slap is often a sign that you are foot striking too far forward and reaching for your next step. Be conscious as to whether you are too collapsed through the hips and running slightly “seated”. Note if you are squeezing your shoulder blades too much or holding your chin and head too far back, which would be effectively working against gravity, or stopping yourself from “falling forward” into your next stride.
Basic drills.
Try the following drills on the treadmill to get you in tune with different components of your run stride. They are great for isolating areas of need for improvement.
- Basic knee lift: Run with exaggerated knee lift, and work from moderate to extreme, while maintaining cadence. Make sure your knees are tracking straight, and not travelling outward.
- High heel lift: Gradually work your heel lift from slightly higher to lightly kicking your butt (if they make it that high). Maintain normal run cadence. Look for imbalances and work on quad flexibility.
- Partner posture drill # 1: have a partner put slight hand pressure on your very lower back at the sacrum as you run (make sure you feel balanced and stable first and that the hand pressure is quite light). Feel forward lean in your hips and compensate slightly by lifting your heel about 1 inch higher on recovery after toeing off, while maintaining cadence. Visualize this lean once hand pressure is removed.
- Partner posture drill #2: have your partner put slight hand pressure between your shoulder blades, and feel forward lean from your chest. Try to run tall through your hips and feel your centre of gravity move forward from the sternum. Don’t collapse at the hips.
- Partner posture drill #3: Your partner places slight hand pressure on the top, center of your head. Think about running with a low even gait, and having no excessive bounce. Afterwards, visualize running under a low ceiling. Excessive bounce would bang your head. This will emphasize forward lean.
Build Strength.
Running hills at different speeds is a great way to build run strength, another winter running goal. The best part about treadmill hills is that you can run uphill limitlessly, and you can also do multiple hill repeats with short rest. You don’t have to run back down the hill between intervals.
Here are 3 great sets:
· Aerobic Strength: 5-10 x (4 minutes Run HR Zone 2 @ 5% grade, 2 minutes walk vigorous @ 10% grade)
· Threshold Strength: 4-6 x (5 minutes HR Zone 3-4 @ 5% grade, 5 minutes jog Zone 1 @ 0% grade)
· Hill Speed: 8-12 x (30 seconds at 5k PR pace @ 3% grade; 30 seconds off straddling the mill). Keep the mill running so you get every seconds worth of your fast running.
Many triathletes cringe at the thought of spending long sessions running on the spot. Frankly, stepping on a moving belt for one to two hours at a time without a clear plan will put you on the fast track to burn out. Most of us multi-sporters are goal oriented so let’s use our type-A tendencies to our advantage! You can integrate these drills into a myriad of aerobic, hill and threshold sets to make them interesting and effective, and to quantify performance gains through heart rate, cadence and pace.
LifeSport head coach Lance Watson has coached a number of Ironman, Olympic and age-group Champions over the past 28 years. He enjoys coaching athletes of all levels. Contact Lance to share your goals, race faster, or master the Ironman distance.
December 6, 2021
Riding in the dirt!
Riding in the Dirt! Cyclocross for your Off Season!
It is the end of triathlon race season and you are just not quite ready to start living on your trainer. You’ve noticed more and more Cyclocross articles pop up on your newsfeed and perhaps you want to explore something new.
Cyclocross began in Europe and has been around for almost as long as people have been road riding. For many years it enabled road racers to maintain fitness and sharpen their bike handling skills in the off season. It turns out that Cyclocross is a perfect sport to keep you outside and on the bike well into the fall and early part of December. One of the chief benefits of learning this dirty sport is in developing your bike handling skills. During the course of a race you will need to take sharp and often wet corners, make and navigate the water/ feeding station, ride shoulder to shoulder with fellow competitors, and deal with unpredictable and unfriendly surfaces. Negotiating corners, hills, bad weather and potholes will be a breeze with the new skills that you will develop during Cyclocross. This winter skills ‘workshop’ will give you more confidence next season on those fast descents and sharp corners on the race course.
A Cyclocross bike should be the same geometry as your road bike but you can make a few small adjustments. In order to give more stability over rougher terrain you can raise the stem stack 3mm and shorten your stem by about 10 millimetres. Replace your road pedals and shoes for mountain bike equipment to make running through the mud and up hills easier with more traction. Finally, optimal gearing is in the range of 46-36 for front and in the rear a 11-28 or 11-30, to account for short steep ascents over soft ground.
Cyclocross season in Canada spans from September to the beginning of December. Races are held on a closed course about 2-3km in length. Each race site is set up differently and all have their own interesting challenges: natural obstacles such as fallen trees, sharp turns, mud (on rainy days, lots of it!), short hills, man-made hurdles, sand pits and stairs. Each race lasts 40 to 60 min, requiring you to work in or just below your aerobic threshold zone.
Training tips
Spend some training time being specific about Cyclocross racing demands. Look for riding routes that have obstacle which help with skill development such as dismounting, remounting, and cornering on soft ground, shouldering your bike and short steep hills that you have to run up. Practise each one of these skills over and over at a slow speed and then increase slowly tell you can do each one at race speed.
Some things to incorporate into your training program.
Bike: 5 min Zone 4 (Aerobic threshold) with 1 min recovery Zone 2 x 4-8 intervals.
Run: Hill repeats of 4 min Zone 4 with 1 min recovery Zone 2 x 3-6. Repeats
Stairs: Find stairs that will give you an effort up to 1-2 min Zone 4-5 with 30-40 sec recovery Zone 2 x 5-8 repeats. This can also be done on a stair machine.
Race Day Tips:
· Arrive early on Race day: If you arrive 1.5 hrs before the first race goes off then you have time to walk the course and make note of all obstacles, hidden holes, tree roots and rocks that you may not see on the bike.
· Pre ride the course slowly at first picking the fastest line around or over each obstacle and increasing your speed each lap.
· Make note of shift points on the course so you can preselect your gear that you will need to keep your momentum going.
· Make note of dismount and remount points at those obstacles that are faster to run up or over.
· Endeavour to improve your skills with each lap.
· Lastly have fun and enjoy!
Cyclocross is a great late season way to race for fun. You will keep running and riding in a novel environment and lay down some great confidence for your next season!
Video Links:
1. Introduction
2. Dismounting
3. Cornering
5. Shouldering
LifeSport coach Mark Overton has coached for over 25 years. Mark has extensive experience helping athletes at the beginner to intermediate level in taking the next step to achieving their goals and dreams. Contact Mark to share your goals, race faster, or master the Ironman distance.